Admin Training

Top Open Source Product Management Software

Discover the leading open source product management software options that can streamline your workflow and boost productivity.

Feature-rich open source software solutions

Software Description Features
Odoo Odoo is a suite of open-source business apps that cover all your company needs: CRM, eCommerce, accounting, inventory, point of sale, project management, etc. CRM, eCommerce, accounting, inventory management, project management
OpenProject OpenProject is a web-based project management software that offers a full set of features for project planning, tracking, and collaboration. Project planning, tracking, collaboration tools, Gantt charts
Redmine Redmine is a flexible project management web application that includes support for multiple projects, issue tracking, Gantt charts, and more. Issue tracking, Gantt charts, multiple projects support

Collaboration and communication in product management

Collaboration and communication are essential aspects of successful product management. Open source product management software offers a platform for teams to work together efficiently and effectively. With features like real-time collaboration and communication tools, teams can streamline their processes and ensure everyone is on the same page.

By utilizing open source product management software, teams can easily track progress, assign tasks, and communicate updates in a centralized platform. This fosters a collaborative environment where ideas can be shared and decisions can be made collectively. Additionally, open source software allows for customization to fit the specific needs of each team, making it a versatile solution for product management.

Benefits of using open source solutions

– Cost savings
– Flexibility and customization
– Community support
– Security and reliability

Open source solutions offer a range of benefits for product management teams. One key advantage is the cost savings associated with using open source software. Without the need to pay for expensive licenses, companies can allocate their budget towards other important areas of their business.

Another benefit is the flexibility and customization that open source solutions provide. Product management teams can tailor the software to meet their specific needs and preferences, resulting in a more efficient and productive workflow.

Additionally, open source software often comes with a strong community of developers and users who provide support and updates. This community support can be invaluable for troubleshooting issues and staying up-to-date with the latest developments in product management technology.

Lastly, open source solutions are known for their security and reliability. With a transparent development process and continuous monitoring by the community, users can trust that their data and processes are secure when using open source product management software.

Shell Scripting for DevOps Tutorial

In this comprehensive tutorial, we will explore the fundamentals of shell scripting and how it can be leveraged in DevOps practices to automate tasks and streamline workflows.

Introduction to Shell Scripting

Shell scripting is a powerful tool for automating tasks in a Linux environment. It allows you to write scripts that can execute commands, manipulate files, and perform various operations with ease.

By learning shell scripting, you can streamline your workflow, increase efficiency, and become a more effective DevOps professional.

In this tutorial, we will cover the basics of shell scripting, including how to create and run scripts, use variables, and control flow with loops and conditional statements.

Whether you are a beginner looking to get started or an experienced developer wanting to enhance your skills, mastering shell scripting is essential for anyone working in the DevOps field.

Advanced Shell Scripting Techniques

– DevOps
– Linux training

Learn advanced shell scripting techniques to enhance your DevOps skills. Mastering shell scripting is crucial for automating tasks and streamlining processes in a Linux environment.

One important technique is creating functions in your scripts to improve readability and reusability. By defining functions, you can simplify complex tasks and make your scripts more modular.

Another key technique is using conditional statements like if-else and case statements to add logic and decision-making capabilities to your scripts. This allows you to create scripts that can adapt to different scenarios and conditions.

Additionally, mastering looping constructs such as for, while, and until loops can help you iterate through lists of items, files, or directories, enabling you to perform repetitive tasks efficiently.

By incorporating these advanced shell scripting techniques into your DevOps workflow, you can increase productivity, reduce manual errors, and become a more effective Linux administrator. Explore online resources and Linux training courses to further enhance your skills in shell scripting for DevOps.

Best Practices for Shell Scripting in DevOps

– Importance of automation in DevOps
– Efficiency in scripting for DevOps workflows
– Error handling and testing in shell scripting for DevOps
– Security considerations in shell scripting for DevOps
– Collaboration and version control in shell scripting for DevOps
– Monitoring and logging in shell scripting for DevOps
– Integration with other tools and technologies in DevOps

When it comes to **shell scripting in DevOps**, following best practices can greatly enhance the efficiency and effectiveness of your automation workflows.

One important aspect to consider is error handling and testing. Make sure to thoroughly test your scripts and include proper error handling mechanisms to ensure smooth execution.

Security is another crucial factor to keep in mind. Always follow security best practices and avoid hardcoding sensitive information in your scripts.

Collaboration and version control are key components of DevOps. Utilize tools like Git for version control and ensure proper collaboration among team members when working on shell scripts.

Monitoring and logging are essential for tracking the performance of your scripts. Implement monitoring solutions and include logging mechanisms to keep track of script execution.

Integrating your shell scripts with other tools and technologies in the DevOps ecosystem can streamline your workflows. Consider incorporating tools like Docker, Kubernetes, or Ansible to enhance automation capabilities.

Bash Scripting Tutorial for Beginners

Welcome to the world of Bash scripting, where beginners can learn the basics of automating tasks and writing scripts in the command line.

Basic Commands and Syntax

– Basic commands like ls, cd, pwd, mkdir, touch, and rm are essential for navigating and managing files in the Bash shell.
– The syntax for executing commands typically follows the format of command options arguments.
– Options are usually preceded by a hyphen (-) and modify the behavior of the command.
– Arguments are the inputs provided to the command to specify what operation to perform.
– Understanding how to use these basic commands and their syntax is fundamental to writing effective Bash scripts.
– Practice using these commands in the terminal to become familiar with their functionality and improve your scripting skills.

Conditional Statements and Loops

Conditional statements in Bash scripting allow you to make decisions in your code based on certain conditions. This is done using keywords such as **if**, **else**, and **elif**.

Loops, on the other hand, are used to iterate over a set of data or perform a certain task repeatedly. Bash supports different types of loops, including **for**, **while**, and **until** loops.

You can use conditional statements and loops together to create powerful scripts that automate tasks in Linux. By mastering these concepts, you can enhance your scripting skills and become more efficient in managing your system.

Practice writing scripts that incorporate conditional statements and loops to solidify your understanding and improve your proficiency in Bash scripting. With dedication and practice, you’ll soon become proficient in using these essential tools in Linux programming.

Input and Output Operations

Operation Description
Input Reading user input from the keyboard or from a file
Output Displaying output to the terminal or writing it to a file

BashCommandsTutorial

Welcome to the ultimate guide to mastering Bash commands!

Basic Bash Commands Overview

– Basic Bash commands
– Linux training
– Command line interface

Bash commands are essential for navigating and interacting with a Unix-based operating system. Here is a brief overview of some of the most common Bash commands that you will need to know:

1. **cd**: Change directory. Use this command to navigate between different directories in the file system.

2. **ls**: List files. This command will display the files and directories within the current directory.

3. **pwd**: Print working directory. This command will show you the full path of the current directory you are in.

4. **mkdir**: Make directory. Use this command to create a new directory within the current directory.

5. **rm**: Remove. This command is used to delete files or directories.

6. **cp**: Copy. Use this command to copy files or directories from one location to another.

7. **mv**: Move. This command allows you to move files or directories to a different location.

These are just a few of the basic Bash commands that you will need to know to navigate and work efficiently within a Unix-based operating system. Practice using these commands regularly to become comfortable with the command line interface.

Advanced Bash Scripting Techniques

– Command substitution
– I/O redirection
– Looping and decision-making
– Functions and scripts
– Error handling
– Regular expressions

Bash scripting offers a wide range of advanced techniques that can help you automate tasks and streamline your workflow.
One important technique is command substitution, which allows you to use the output of a command as an argument for another command.
I/O redirection is another powerful feature in Bash, allowing you to control where input and output is directed.
Looping and decision-making structures can help you create more complex scripts that can handle a variety of scenarios.
Functions and scripts allow you to modularize your code and make it more reusable.
Error handling is crucial in Bash scripting to ensure that your scripts can gracefully handle unexpected situations.
Regular expressions can be used in Bash scripting to search for patterns in text, making it easier to manipulate and process data.

By mastering these advanced techniques, you can become a more proficient Bash scripter and enhance your Linux skills.

Practical Tips for Efficient Command Line Usage

– Basic commands like ls, cd, and pwd
– Using wildcards for efficient file manipulation
– Navigating the file system with ease
– Redirecting input and output
– Creating and editing files with vim
– Understanding permissions and ownership
– Using pipes to connect commands
– Searching for files and text with grep
– Working with compressed files using tar and gzip

Master Linux Administration

Delve into the world of Linux Administration and unlock the secrets to mastering this powerful operating system.

Managing User Accounts

To manage user accounts in Linux, you can use various command line tools such as **useradd** and **usermod**. These commands allow you to create new users, modify existing users, and manage user settings.

To create a new user, you can use the **useradd** command followed by the username you want to create. You can also specify options such as the user’s home directory and default shell.

To modify an existing user account, you can use the **usermod** command followed by the username you want to modify. This command allows you to change the user’s home directory, default shell, or other settings.

You can also manage user account settings using the **passwd** command, which allows you to change a user’s password or lock their account. Additionally, you can use the **chage** command to set password expiration dates and other account settings.

Network Configuration

Configuration Description
Hostname Defines the name of the system on the network.
IP Address Specifies the unique address assigned to the system on the network.
Subnet Mask Determines the network portion of the IP address.
Default Gateway Specifies the router’s IP address for reaching other networks.
DNS Servers Resolves domain names to IP addresses for network communication.

Automation and Scripting

Through automation and scripting, you can create scripts to handle routine tasks like system updates, user management, or log monitoring. This not only saves time but also reduces the risk of human error in executing these tasks manually. Additionally, automation and scripting skills are highly valued in the job market for Linux administrators.

By mastering automation and scripting in Linux administration, you can become a more efficient and effective system administrator. These skills will not only enhance your productivity but also open up new opportunities for career advancement in the field of Linux administration. Start learning and practicing automation and scripting to take your Linux administration skills to the next level.

Free Personal Care Assistant Training Program

Are you looking to jumpstart your career in the healthcare industry? Look no further! Our free Personal Care Assistant Training Program is the perfect opportunity for you to gain the skills and knowledge needed to succeed in this rewarding field.

Comprehensive curriculum and hands-on training

Through a combination of classroom instruction and practical experience, you will learn essential skills such as patient care, medication administration, and infection control.

Our program also covers important topics like communication techniques, *personal hygiene*, and safety protocols to ensure you are well-equipped to provide quality care to clients.

Upon completion of the training program, you will have the knowledge and skills necessary to excel as a Personal Care Assistant in various healthcare settings.

Flexible scheduling options for training

– Free Personal Care Assistant Training Program

Our Free Personal Care Assistant Training Program offers flexible scheduling options to accommodate individuals with busy lifestyles. Whether you work full-time, part-time, or have other commitments, you can tailor your training schedule to fit your needs.

With our program, you can choose to attend training sessions in the evenings, on weekends, or even take online courses at your own pace. This flexibility allows you to balance your training with your other responsibilities, making it easier to advance your career in personal care assistance.

By offering flexible scheduling options, we strive to make our training program accessible to a wide range of individuals who are interested in pursuing a career in personal care assistance. Take advantage of this opportunity to gain valuable skills and knowledge without compromising your existing commitments.

Certification exam preparation and support

Prepare for your certification exam with our comprehensive training program for Personal Care Assistants. Our program includes all the necessary resources and support to help you succeed in your exam.

We offer study materials, practice tests, and one-on-one guidance from experienced instructors to ensure you are well-prepared. Our program covers all the essential topics and skills required for the exam, so you can approach it with confidence.

Whether you are just starting your career as a Personal Care Assistant or looking to advance your skills, our training program is designed to meet your needs. Take advantage of this free opportunity to enhance your knowledge and expertise in the field.

Enroll in our training program today and take the first step towards achieving your certification as a Personal Care Assistant. With our support and resources, you can reach your goals and excel in your career.

Scripting Tutorial

Looking to master the art of scripting? Dive into our comprehensive tutorial to learn the ins and outs of writing scripts like a pro.

Introduction to Shell Scripting

A command line interface with a terminal window.

Shell scripting is a powerful tool that allows users to automate tasks and create customized scripts for their Linux system.

By utilizing the command-line interface, users can write scripts in a variety of shell languages such as Bash, C shell, or KornShell.

These scripts can manipulate standard streams, execute commands, and interact with the operating system.

Learning shell scripting is essential for any Linux user looking to streamline their workflow and become more efficient in their programming tasks.

Whether you are a beginner or an experienced programmer, mastering shell scripting will open up a world of possibilities for customizing your Linux experience.

Take the first step in your Linux training journey by diving into the world of shell scripting and unlocking the full potential of your system.

Brief History of Shell Scripting

Shell command prompt

Shell scripting has been around since the early days of Unix in the 1970s. The concept emerged as a way to automate repetitive tasks by creating a series of commands to be executed in sequence using a Unix shell. The most popular shell scripting language is Bash, which stands for “Bourne Again Shell,” named after its creator Stephen R. Bourne. Other notable shells include C shell and KornShell.

Shell scripts are plain text files that contain a series of commands that can be executed in a Unix command-line interface. They utilize standard streams for input/output and can be used to perform a wide range of tasks, from simple file operations to complex system administration tasks. Shell scripting is often used by programmers to automate tasks and create custom tools.

Learning shell scripting is essential for anyone looking to dive deeper into Unix/Linux system administration or programming. By mastering shell scripting, you can streamline your workflow, automate repetitive tasks, and gain a deeper understanding of how your computer operates. Whether you’re a beginner or an experienced programmer, shell scripting is a valuable skill to add to your repertoire.

Audience and Typographical Conventions

Typewriter or keyboard with text

When writing scripts for Linux, it is important to consider your audience and adhere to typographical conventions. This ensures that your scripts are readable and maintainable for others who may need to work with them.

By following standard conventions, such as using a monospaced font and clear indentation, you can make your scripts easier to understand. Remember to provide comments within your scripts to explain the purpose of each section, making it easier for others to follow along.

When working with scripting languages like Bash, Python, or Perl, be mindful of the commands and syntax specific to each language. Understanding the basics of programming and computer programs will also be beneficial when writing scripts.

Getting Started with Extended Shell Scripts

To get started with extended shell scripts, you will need to have a basic understanding of Shell script and Bash (Unix shell). It is important to have knowledge of programming languages like Python or Perl to create more complex scripts.

When writing a script, make sure to include necessary commands and logic to achieve the desired outcome. Utilize the Chmod command to make your script executable.

Remember to test your script thoroughly before implementing it in a production environment. Use a monospaced font for better visibility and readability.

If you encounter any issues or errors, don’t hesitate to seek help and feedback from experienced programmers. With practice and experience, you will become proficient in creating efficient and effective shell scripts.

Understanding Kernels and Shells

Understanding **kernels** and **shells** is essential for anyone looking to delve into the world of scripting. The **kernel** is the core of the operating system, managing resources and interacting with hardware, while the **shell** is the interface through which users interact with the system.

In the context of **Linux training**, knowing how to work with **shells** such as Bash can greatly enhance your scripting abilities. Writing a **shell script** involves using a **scripting language** to automate tasks and execute **commands** in a **programming language**-like manner.

When writing a **shell script**, pay attention to things like file permissions (**Chmod**), understanding the role of the interpreter, and working with **plain text**. These skills are crucial for creating efficient and effective scripts that can handle various **input/output** scenarios.

By mastering the fundamentals of **kernels** and **shells**, you’ll be well-equipped to explore the vast possibilities of **computer programming** and unleash your creativity in the world of scripting.

Exploring Command Line and Graphical Shells

When it comes to scripting on Linux, understanding command line and graphical shells is essential. The Bash shell is a popular Unix shell that allows users to interact with their system through commands. Scripting in Bash involves writing a series of commands that can be executed in sequence to automate tasks or perform specific functions.

On the other hand, graphical shells provide a more user-friendly interface for interacting with the system. They allow users to navigate through directories, launch applications, and manage files using a visual interface. Understanding both command line and graphical shells is important for anyone looking to delve into Linux scripting.

Whether you prefer working with commands in a terminal window or navigating through a graphical interface, mastering scripting languages like Python or Ruby can greatly enhance your efficiency and productivity. These languages allow you to write scripts that automate tasks, manipulate data, and perform complex calculations with ease.

By familiarizing yourself with different shells and scripting languages, you can unlock the full potential of your Linux system and take your programming skills to the next level. Experiment with different commands, explore the capabilities of various shells, and don’t be afraid to push your boundaries when it comes to scripting on Linux.

Basics of Terminal and Shell Scripting

Terminal window

When working in a Linux environment, understanding the basics of the terminal and shell scripting is crucial. The terminal is the interface through which you can interact with the operating system using text commands. Shell scripting involves writing scripts that automate repetitive tasks or carry out a series of commands.

One of the most commonly used shells is Bash, which stands for “Bourne Again Shell”. It is a powerful Unix shell that provides a wide range of features for scripting. Learning how to write and execute shell scripts will greatly enhance your productivity and efficiency in a Linux environment.

Shell scripts are essentially small programs that can be executed from the command line. They can be used to perform tasks such as file manipulation, system administration, and data processing. By mastering the basics of terminal and shell scripting, you will unlock the full potential of the Linux operating system.

Importance and Advantages of Shell Scripts

Shell scripts are essential tools for automating tasks on Unix-based systems. They provide a convenient way to execute a series of commands in a specific sequence, saving time and effort. Shell scripts allow users to automate repetitive tasks, manage system configurations, and perform complex operations with ease. They are particularly useful for system administrators and programmers who need to perform routine tasks efficiently.

One of the key advantages of shell scripts is their flexibility and portability. They can be easily shared and run on different Unix-based systems without the need for extensive modifications. This makes them a valuable tool for managing multiple systems or environments. Additionally, shell scripts can be used to create custom commands and functions, making it easier to perform specific tasks quickly and accurately.

By learning how to write and execute shell scripts, individuals can improve their productivity and efficiency in managing Unix-based systems. With the ability to automate tasks and customize workflows, shell scripts are a valuable skill for anyone working with Linux or Unix systems. Whether you are a system administrator, programmer, or IT professional, mastering shell scripting can help you streamline your work and achieve better results.

Limitations and Disadvantages of Shell Scripts

Command line interface

Shell scripts have limitations and disadvantages that users should be aware of. One limitation is that they can be slower than compiled programs, as they are interpreted at runtime. Another disadvantage is that they may not be as secure as compiled programs, as the source code is often visible.

Additionally, shell scripts may have limitations in terms of scalability and complexity, making them unsuitable for certain tasks. It’s also important to note that debugging shell scripts can be more challenging compared to other programming languages.

Despite these limitations, shell scripts are still valuable tools for automating tasks and simplifying workflows in a Unix environment.

Simple Demo of Shell Scripting with Bash Shell

Terminal window with a Bash prompt

To demonstrate Shell Scripting with Bash Shell, let’s create a simple script. Open a text editor and type “#!/bin/bash” at the beginning to indicate it’s a Bash script. Next, add a simple command like “echo Hello, World!” to print a message. Save the file with a .sh extension.

Open a terminal and navigate to the directory where the script is saved. Run the script by typing “./yourscript.sh” and hit enter. You should see the output “Hello, World!” displayed on the terminal.

Congratulations, you have successfully created and executed a basic shell script using Bash Shell. This is just the beginning of your journey into the world of scripting and automation. Explore more commands and functionalities to enhance your skills. Happy scripting!

ActiveAdmin Tutorial For Beginners

Welcome to the world of ActiveAdmin! In this tutorial, we will guide beginners through the basics of using ActiveAdmin to create powerful and customizable admin interfaces for Ruby on Rails applications. Let’s dive in and unlock the full potential of ActiveAdmin together.

Overview of Active Admin Tutorial

ActiveAdmin is a powerful administration framework for Ruby on Rails applications. It provides a simple and intuitive way to manage data in your web application, making it easier to create and manage user interfaces for your data models.

With ActiveAdmin, you can quickly generate a **dashboard** to monitor key metrics, manage users, and perform other administrative tasks with ease. It’s a great tool for developers who want to focus on building the core features of their applications without spending too much time on the administrative side.

In this tutorial, we will cover the basics of setting up ActiveAdmin in a Ruby on Rails application. We will walk you through the installation process, show you how to create **resources** for your models, and demonstrate how to customize the interface to fit your needs.

By the end of this tutorial, you will have a good understanding of how to use ActiveAdmin to create powerful admin interfaces for your Ruby on Rails applications. Whether you are a beginner or an experienced developer, this tutorial will help you get up and running with ActiveAdmin in no time.

Setting Up Active Admin and Custom Resources

To set up Active Admin and custom resources, first, make sure you have Active Admin installed in your Rails application. You can do this by adding the gem to your Gemfile and running `bundle install` to install it.

Next, generate the Active Admin files by running the `rails generate active_admin:install` command in your terminal. This will create the necessary files and folders for Active Admin in your application.

Once Active Admin is set up, you can create custom resources by generating a new resource using the `rails generate active_admin:resource` command followed by the name of the resource you want to create. This will generate the necessary files for your custom resource.

After generating the resource, you can customize it by adding fields, filters, scopes, and actions to it. This will allow you to tailor the resource to fit the specific needs of your application.

To make the custom resource available in the Active Admin dashboard, you need to register it in the `admin` folder. You can do this by creating a new file for your resource and registering it using the `ActiveAdmin.register` method.

After registering the custom resource, you will be able to see it in the Active Admin dashboard and manage it like any other resource. This allows you to have full control over how the resource is displayed and managed in your application.

Interacting and Managing with Active Admin

When working with Active Admin, one of the first things you’ll need to do is define the resources that you want to manage. This is done by creating a new file in the `app/admin` directory and registering your models with Active Admin using the `register` method. This will generate a basic interface for each of your resources, allowing you to view, create, update, and delete records.

Active Admin also provides a wide range of customization options, allowing you to tailor the interface to suit your specific needs. You can customize the index, show, form, and filters for each resource, as well as define custom actions and sidebars. This level of flexibility makes it easy to create a feature-rich admin interface that meets your exact requirements.

In addition to managing your resources, Active Admin also provides powerful tools for interacting with your data. You can easily search, filter, and sort records, as well as export data in various formats such as CSV, XML, and JSON. Active Admin also supports batch actions, allowing you to perform bulk operations on multiple records at once.

System Administration Courses: Certification, Training, Career Path

Are you ready to take your technical skills to the next level? Explore the world of system administration with our comprehensive guide to certification, training, and career paths.

System Center Configuration Manager and Windows PowerShell Administration

System Center Configuration Manager and Windows PowerShell Administration are essential skills for any system administrator looking to excel in their career. These courses provide in-depth knowledge on managing and maintaining Windows systems efficiently and securely.

By obtaining certification in System Center Configuration Manager and Windows PowerShell Administration, individuals can demonstrate their expertise in handling complex system configurations and automating routine tasks. This can lead to better job prospects and higher salaries in the field of system administration.

Training in these courses will cover topics such as software deployment, patch management, system security, and PowerShell scripting. This knowledge is crucial for ensuring the smooth operation of servers and networks in an organization.

With the increasing reliance on technology and the growing threat of cyber attacks, skilled system administrators who can effectively manage and secure systems are in high demand. Certification in System Center Configuration Manager and Windows PowerShell Administration can open up doors to a rewarding career in system administration.

Whether you are just starting out in the field or looking to advance your career, investing in training and certification in System Center Configuration Manager and Windows PowerShell Administration is a wise decision. Take the first step towards a successful career in system administration by enrolling in these courses today.

Windows Server 2016 Installation and ITIL® 4 Foundation

Windows Server 2016 Installation and **ITIL® 4 Foundation** courses are essential for aspiring **system administrators** looking to advance their careers. These courses provide valuable **certifications** that are highly sought after in the industry.

By completing these courses, individuals will gain a deep understanding of **Windows Server 2016** installation and **ITIL® 4** best practices. This knowledge is crucial for effectively managing **server environments** and ensuring optimal performance.

With the increasing demand for skilled **system administrators** in today’s technology-driven world, having these certifications can open up a world of opportunities. From **network virtualization** to **cloud computing**, the skills learned in these courses are applicable across various IT environments.

Whether you’re looking to specialize in **Microsoft technologies** or pursue a career in **data centers**, these courses will provide you with the foundation needed to succeed. Don’t wait any longer – enroll in **Windows Server 2016 Installation** and **ITIL® 4 Foundation** courses today to kickstart your career in **system administration**.

AWS System Operations and Microsoft Exchange Server Administration

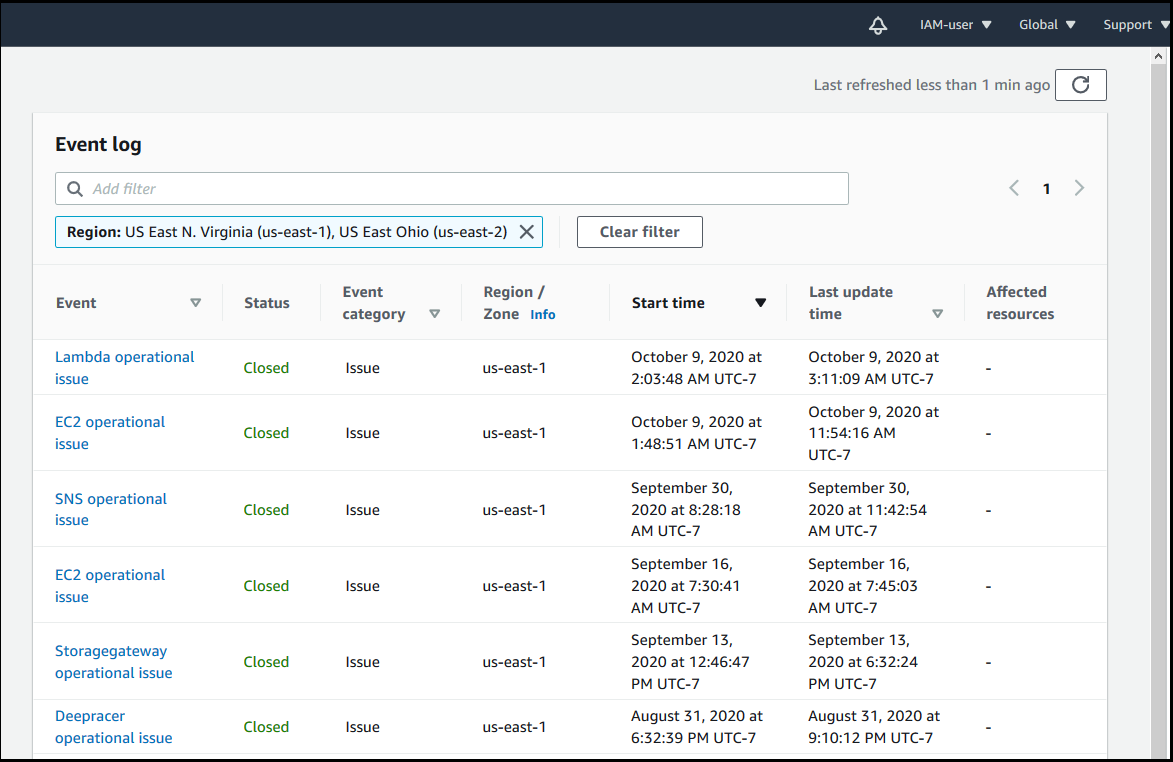
AWS console dashboard

AWS System Operations course covers topics such as cloud computing, server management, and network security. This certification is highly valued by employers as more businesses are moving their operations to the cloud. With this training, you’ll be equipped to handle the complexities of managing AWS systems efficiently.

On the other hand, Microsoft Exchange Server Administration course focuses on managing email servers using Microsoft Exchange. This training covers areas like email security, mailbox management, and troubleshooting common issues. With this certification, you’ll be well-prepared to handle the email infrastructure of organizations using Microsoft Exchange.

By completing these courses and obtaining the relevant certifications, you’ll open up new career opportunities in system administration. Whether you’re looking to work for a large corporation or start your own consulting business, these certifications will validate your skills and expertise in system operations and server administration.

Red Hat System Administration and Technology Considerations

Red Hat System Administration
Course Name Red Hat System Administration I (RH124)
Duration 5 days
Description This course is designed for IT professionals who are new to Linux and require core Red Hat Enterprise Linux skills. It covers the foundational skills needed to manage and operate a Red Hat Enterprise Linux system.
Course Name Red Hat System Administration II (RH134)
Duration 4 days
Description This course goes deeper into system administration tasks and focuses on managing storage and security using Red Hat Enterprise Linux. It is recommended for IT professionals who have completed RH124 or have equivalent experience.
Technology Considerations – Red Hat Enterprise Linux

– System security

– Storage management

– Network configuration

– User and group administration

Kubernetes Installation Essentials

In order to successfully deploy and manage containerized applications, understanding the essentials of Kubernetes installation is crucial.

Before you begin

Ensure that your **Linux distribution** is up-to-date before attempting to install **Kubernetes**. Check if the **systemd** service is running properly, as it is crucial for managing services in Linux. Familiarize yourself with the basics of **cloud computing** to understand how Kubernetes operates in a virtual environment.

Make sure your system meets the minimum requirements for running Kubernetes, such as sufficient **memory** and **CPU** resources. Configure your **network interfaces** correctly to ensure communication between nodes in a **computer cluster**. Install necessary packages using your distribution’s **package manager** to prepare for Kubernetes installation.

Understand the **booting** process of your Linux system to troubleshoot any issues that may arise during Kubernetes installation. Follow best practices for configuring **network settings** and **firewalls** to secure your Kubernetes environment. Regularly update your system to patch any **software bugs** that could potentially impact Kubernetes functionality.

Check network adapters
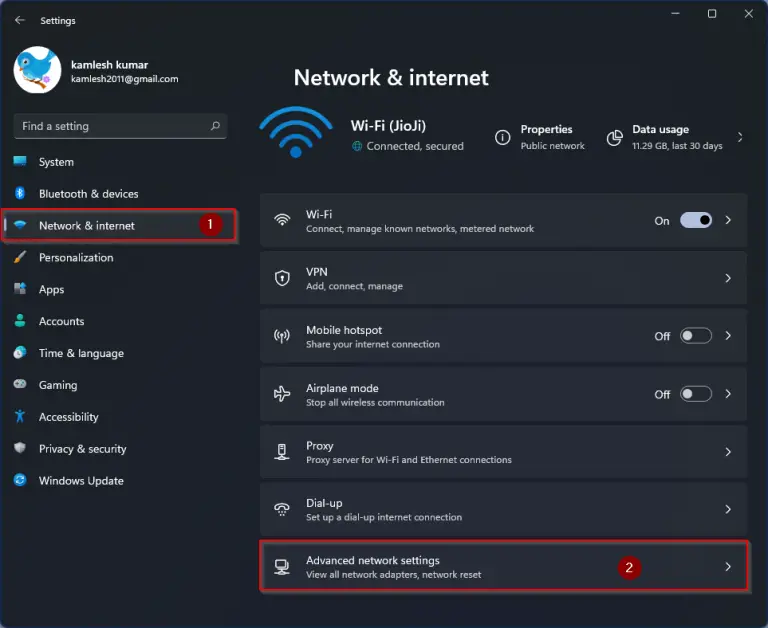
Network adapter settings

To ensure a smooth Kubernetes installation, it is crucial to check your network adapters. Network adapters play a vital role in communication between nodes within a cluster, so it is important to verify that they are properly configured and functioning correctly.

Before proceeding with the installation process, use commands such as ifconfig to inspect the status of your network interfaces. Make sure that the correct IP addresses, subnet masks, and gateway addresses are set up to enable seamless communication between nodes.

Additionally, check for any network adapter errors or issues that may hinder the installation process. Troubleshoot any connectivity problems and ensure that your network adapters are able to communicate with other nodes effectively.

By verifying and ensuring the proper functionality of your network adapters, you can avoid potential connectivity issues and ensure a successful Kubernetes installation. This step is essential in creating a stable and reliable cluster environment for your applications to run smoothly.

Check required ports

Verify networking: In addition to checking ports, it’s important to verify that your network configuration is properly set up for Kubernetes. This includes ensuring that all nodes in the cluster can communicate with each other over the network. Utilize tools like ifconfig or netcat to check network interfaces and connectivity between nodes.

Secure access: To maintain security, consider setting up firewalls or network policies to restrict access to certain ports and services within your Kubernetes cluster. Utilize tools like sudo for administrative access control and configure secure authentication mechanisms to prevent unauthorized access to your cluster.

Installing a container runtime

To install a container runtime for Kubernetes, you can choose from options such as Docker, Containerd, or CRI-O. For Docker, ensure you have the correct version that is compatible with Kubernetes. Use your Linux distribution’s package manager to install the runtime. If you encounter any issues, refer to the official documentation for troubleshooting steps.

Once the container runtime is installed, configure it to work with Kubernetes. This typically involves adjusting configuration files and ensuring the runtime is set up to communicate with the Kubernetes API server. Make sure the runtime is running as a systemd service to ensure it starts automatically on boot.

Test the container runtime by deploying a simple container using a Kubernetes pod. This will help verify that the installation was successful and that the runtime is functioning correctly.

Installing kubeadm, kubelet, and kubectl

To install **kubeadm**, **kubelet**, and **kubectl**, you can follow these steps:

1. Start by updating your package index and installing necessary tools like curl and apt-transport-https.
2. Add the Kubernetes signing key and repository to your system.
3. Install the required packages using apt-get or yum, depending on your Linux distribution.
4. Make sure all necessary packages are installed and up to date.
5. Verify the installation by checking the versions of kubeadm, kubelet, and kubectl.

Once you have successfully installed these essential components, you will be ready to start setting up and managing your Kubernetes cluster.

Configuring a cgroup driver
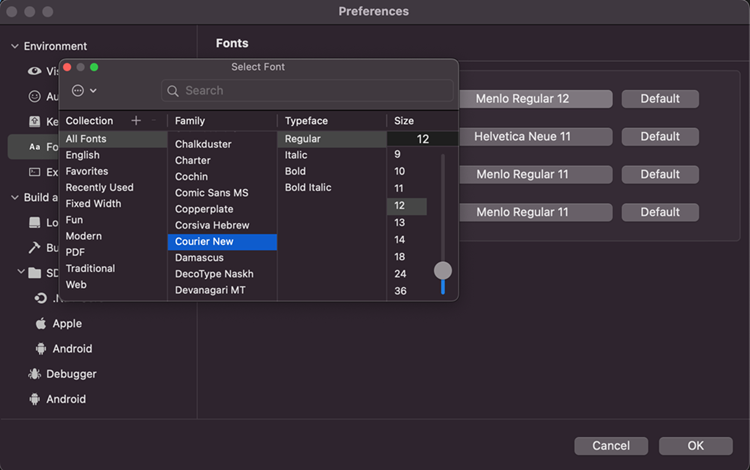
Terminal window with cgroup driver configuration

To configure a cgroup driver for Kubernetes installation, you need to first determine which cgroup driver your system is currently using. Common cgroup drivers include cgroupfs and systemd.

If your system is using cgroupfs, you’ll need to ensure that the cgroup driver is specified in the kubelet configuration file. This can be done by adding the “–cgroup-driver=” flag followed by “cgroupfs” to the kubelet service file.

On the other hand, if your system is using systemd as the cgroup driver, you’ll need to specify this in the kubelet configuration file with the “–cgroup-driver=” flag followed by “systemd”.

After making these changes, restart the kubelet service for the changes to take effect. It’s important to verify that the cgroup driver has been successfully configured before proceeding with the Kubernetes installation.

Learning environment

Having a good grasp of operating systems like Red Hat Enterprise Linux, Ubuntu, CentOS, Fedora, and Debian will also be beneficial in navigating the installation process. Additionally, knowledge of networking fundamentals and protocols, such as Internet Protocol and MAC addresses, will be essential for setting up a functional Kubernetes environment.

Understanding basic computer hardware components, like CPUs and memory, will also aid in optimizing your Kubernetes installation. Consider exploring tools like Docker for containerization and netcat for network debugging to enhance your learning experience.

Production environment

Red Hat Enterprise Linux and Ubuntu are popular choices for hosting Kubernetes clusters, but make sure your chosen OS is compatible with Kubernetes.

Consider factors like network interfaces, memory management, and CPU allocation to ensure optimal performance of your Kubernetes setup.

Follow best practices for configuring your environment, including setting up private networks, managing storage with Fstab, and securing your system with tools like Sudo.

Software prerequisites

Additionally, make sure your system has the necessary memory (RAM) and CPU resources to support the installation and operation of Kubernetes. A reliable network connection is also crucial for communication between nodes in the cluster.

It’s important to have a basic understanding of **networking**, **cloud computing**, and **operating systems** to effectively set up and manage Kubernetes. Taking Linux training can be beneficial in gaining the necessary skills for working with Kubernetes.

Lastly, familiarize yourself with **Docker** as Kubernetes often works in conjunction with containerized applications. By having these software prerequisites in order, you’ll be better prepared for a successful Kubernetes installation.

Hardware prerequisites

When setting up Kubernetes, ensure your hardware meets the necessary prerequisites.
You will need a minimum of 2 GB of RAM to run Kubernetes efficiently.
Additionally, make sure your CPU has at least 2 cores to handle the workload.

It is also important to have a stable internet connection, as Kubernetes relies on communication between nodes.
Consider using a private network to ensure security and avoid potential external threats.
Ensure your hardware supports virtualization, as Kubernetes often runs on virtual machines.

By meeting these hardware prerequisites, you can ensure a smooth installation and operation of Kubernetes on your system.

Install OvalEdge

Once downloaded, use the kubectl command to apply the OvalEdge YAML files to your Kubernetes cluster.

Make sure to specify any necessary configurations, such as memory limits or persistent storage, in the YAML files before applying them.

After applying the files, use kubectl to check the status of the OvalEdge pods to ensure they are running successfully.

Finally, access the OvalEdge dashboard using the specified URL to start using the platform for data management and analytics.

Create a cluster

Next, install Docker, which is essential for running containers in Kubernetes. Once Docker is set up, you can proceed with installing Kubernetes using a tool like kubeadm. Follow the official Kubernetes documentation for detailed instructions on the installation process.

After Kubernetes is installed, you can start setting up your cluster by creating a master node and joining worker nodes to it. Make sure to configure networking, storage, and security settings according to best practices.

Regularly update your Kubernetes installation to ensure it is secure and up-to-date with the latest features and bug fixes. Consider taking Linux training to deepen your understanding of Kubernetes and improve your cluster management skills.

Summary

Kubernetes Installation Essentials

When setting up Kubernetes, ensure to have a strong understanding of Linux systems to navigate the installation process smoothly. Start by choosing a compatible Linux distribution like Fedora, CentOS, Debian, or Alpine Linux. Familiarize yourself with essential concepts such as memory management, networking, and CPU allocation.

Ensure that your system meets the necessary hardware requirements, including sufficient RAM and CPU resources. Pay attention to details like MAC addresses and network interfaces to configure your nodes correctly. Understanding concepts like memory paging and booting processes will be crucial for a successful installation.

Utilize tools like Docker for containerization and API integration.

Components

The kube-apiserver acts as the front-end for Kubernetes, handling all communication and serving the API. The kube-controller-manager manages different controllers that regulate the state of the cluster. The kube-scheduler is responsible for placing workloads onto nodes based on resource requirements.

Etcd is a distributed key-value store used to store all cluster data. The kubelet is an agent running on each node, responsible for managing the containers. Lastly, kube-proxy is a network proxy that maintains network rules.

Understanding these components is crucial for a successful Kubernetes installation and operation. Be sure to familiarize yourself with each one to effectively manage and scale your Kubernetes cluster.

Pre-requisites

Before diving into Kubernetes installation, ensure you have a solid understanding of Linux operating systems. Familiarize yourself with basic concepts such as memory paging and network interfaces.

Having knowledge of operating system fundamentals, like Fedora Linux or Alpine Linux, will be beneficial. Understanding concepts like MAC addresses and private networks will also be helpful during the installation process.

Make sure you have the necessary hardware requirements, including a sufficient amount of RAM and CPU. It’s also important to have a stable internet connection for downloading necessary software and updates.

Consider taking a Linux training course to enhance your skills and prepare yourself for working with Kubernetes and other related technologies. This will set you up for success and ensure a smooth installation process.

Troubleshooting

– When facing issues during Kubernetes installation, start by checking the system requirements and ensuring all prerequisites are met.
– Verify that your system has enough resources such as RAM and CPU for smooth operation.
– Check the network configuration, including IP addresses and MAC addresses, to ensure proper communication between nodes.
– Ensure that all necessary software components, such as the operating system and necessary libraries, are properly installed and up to date.
– Troubleshoot any errors related to port conflicts or connectivity issues within the computer cluster.
– Use diagnostic tools and logs to identify and resolve any software bugs or compatibility issues that may arise.
– Following these steps will help streamline the Kubernetes installation process and ensure a successful deployment.