In the fast-paced world of technology, staying ahead of the curve is essential. The DevOps Certification Course Training 2024 offers professionals the opportunity to enhance their skills and expertise in this rapidly evolving field.
Enrollment Requirements for DevOps Certification Course
Enrollment requirements for the **DevOps certification course** include a basic understanding of **Linux** and proficiency in **software development**. Candidates should also have knowledge of **cloud computing** and be familiar with tools such as **Docker** and **Kubernetes**. Prior experience in **Agile software development** is beneficial but not mandatory. **Professional certification** in related fields is a plus. The course is designed to enhance skills in **continuous integration** and **continuous delivery**, emphasizing collaboration and **security engineering**.
For those looking to advance their careers in **software engineering**, this training is a valuable opportunity.
Admission Process for DevOps Training Program
The ***admission process*** for our ***DevOps*** training program is straightforward and efficient. To enroll, simply visit our website and fill out the online application form. Once submitted, our admissions team will review your application and notify you of your acceptance.
Accepted students will receive further instructions on how to complete the registration process and secure their spot in the program. We offer both ***online*** and ***offline*** training options to accommodate different learning preferences.
Whether you are new to ***DevOps*** or looking to enhance your skills, our certification course will provide you with the knowledge and tools needed to succeed in the ever-evolving tech industry.
What to Expect from DevOps Training Program
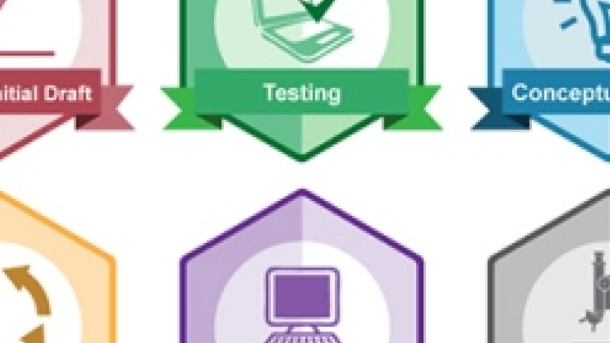
When enrolling in a **DevOps** training program, expect to gain a strong foundation in key concepts such as **continuous delivery**, **collaboration**, and **security engineering**. You will learn to work with tools like **Kubernetes**, **Docker**, and **Amazon Web Services**, and understand the importance of **cloud computing** and **agile software development**. The course will also cover topics like **continuous integration**, **software testing**, and **professional certification**. By the end of the program, you will be equipped with the skills needed to excel in the fast-paced world of **software engineering** and **cloud-based integration**.
Certificate Issued Upon Completion
Upon completion of our **DevOps Certification Course Training 2024**, participants will receive a certificate to validate their newfound skills in areas such as **Linux**, **Docker**, **Scrum**, and more. This certificate serves as tangible proof of your expertise in **cloud computing**, **software testing**, and **computer security**. With this credential in hand, you can showcase your proficiency to potential employers and clients. Our training program is designed to provide you with the necessary knowledge and tools to excel in the ever-evolving field of **computer programming** and **software architecture**. Join us and enhance your credibility in the industry today!
Preparation Material Provided for DevOps Course
| Preparation Material Provided for DevOps Course |
| 1. Comprehensive course material covering all aspects of DevOps |
| 2. Video lectures and tutorials by industry experts |
| 3. Hands-on labs and exercises for practical learning |
| 4. Access to online resources and tools for continuous practice |
| 5. Mock tests and practice exams to assess your readiness for certification |
| 6. Personalized guidance and support from instructors throughout the course |
Global Teaching Assistance for DevOps Students
Our DevOps Certification Course Training for 2024 offers **global teaching assistance** for DevOps students looking to enhance their skills. With a focus on **Linux training**, students will gain valuable knowledge in areas such as IBM cloud computing, Docker, and computer security. Our curriculum covers a range of topics including software architecture, Python programming, and cloud-based integration. By enrolling in this course, students will be equipped with the necessary skills to excel in the fast-paced world of DevOps. Join us to elevate your career in the field of technology.
Instructor Selection Process for DevOps Training
The instructor selection process for our DevOps Training program is rigorous and thorough. Our instructors are experts in the field with practical experience in IBM cloud computing, Docker (software), Scrum (software development), and more. They are skilled in computer programming languages such as Python and have hands-on experience with Amazon Web Services and computer data storage.
We prioritize instructors who have a strong background in infrastructure design and user experience design, as well as excellent communication skills. This ensures that our students receive the highest quality training possible.
How to Earn DevOps Certification
To earn a DevOps certification, consider enrolling in a DevOps Certification Course Training program. Look for courses that cover essential topics like Linux training, Docker, Scrum, and Python programming. These skills are crucial for success in the field. Make sure the course provides hands-on experience with application software and computer data storage.
Additionally, focus on improving your communication and collaboration skills, as they are essential for working in a DevOps environment. Online and offline training options are available to suit your schedule and preferences.
Support System for DevOps Students
When pursuing a DevOps certification course, having a strong support system is essential for success. Whether you are learning online or offline, having access to mentors and resources can greatly enhance your learning experience. Look for courses that offer support from experienced engineers and industry professionals.
Consider joining online communities or forums where you can connect with other DevOps students to share knowledge and experiences. Utilize tools like Docker for application software management and Python for programming tasks. Stay updated on industry trends like Scrum for software development and user experience design for better **microarchitecture** and **infrastructure** practices.
Having a reliable support system can boost your confidence and credibility as a DevOps professional.
Refund Policy for DevOps Training Program
Our refund policy for the DevOps training program is designed to ensure your satisfaction with the course. If you are not satisfied with the training within the first week, you may request a refund.
Career Opportunities Post DevOps Certification
With a **DevOps certification** under your belt, a world of **career opportunities** opens up for you. Companies are constantly on the lookout for skilled professionals who can streamline their development processes and improve efficiency.
Whether you are interested in working with **Docker**, **Scrum**, **Python**, or any other relevant technologies, a **DevOps certification** can help you stand out in the job market.
Consider taking a **Linux training** course to further enhance your skills and increase your chances of landing a rewarding position in the tech industry.
Validity Period of DevOps Certificate
The validity period of a DevOps certificate typically lasts for two years. After this time, professionals will need to renew their certification to stay up to date with the latest industry standards and practices. This ensures that individuals are continuously enhancing their skills and knowledge in the field of DevOps.
Renewing your DevOps certification demonstrates your commitment to professional development and staying current in the ever-evolving technology landscape. It also showcases your dedication to mastering the tools and methodologies used in DevOps, such as Docker, Scrum, and Python.
By staying certified, you are positioning yourself as a valuable asset in the job market, whether you are seeking opportunities online or offline. Employers are more likely to trust professionals with up-to-date certifications, knowing they have the skills needed to excel in roles related to microarchitecture, data analysis, computing platforms, and engineering.
Prerequisites for DevOps Program
To enroll in a DevOps certification course training in 2024, you will need a solid foundation in Linux operating systems. Familiarity with Docker for containerization, Scrum for Agile software development, and Python for scripting will also be beneficial. Additionally, a background in data analysis, computing platforms, and engineering principles will help you excel in the program. Whether you choose to take the course online or offline, having these prerequisites will set you up for success in your DevOps journey.
Skills Acquired from DevOps Training
Skills acquired from DevOps training include proficiency in tools like Docker for containerization, knowledge of Scrum methodologies for efficient software development, and the ability to automate processes using Python. This training equips individuals with the skills to work effectively in both online and offline environments, utilizing various computing platforms to streamline operations. DevOps certification course training also hones skills in problem-solving and collaboration, essential for success as a DevOps engineer.
Online Delivery of DevOps Classes
Enroll in our online ***DevOps classes*** for convenient and comprehensive training. Our courses cover essential tools and techniques such as Docker, Scrum, and Python. Gain hands-on experience working with a variety of computing platforms to enhance your skills as a DevOps engineer. With our certification course, you’ll be equipped with the knowledge and expertise needed to excel in the fast-paced world of DevOps.
Don’t miss out on this opportunity to advance your career and stay ahead of the competition in 2024. Sign up today for our online delivery of DevOps classes.
Course Objectives for DevOps Certification
Course objectives for **DevOps Certification** include mastering **Docker** for containerization, understanding **Scrum** for agile development, learning **Python** for scripting, and grasping the fundamentals of **DevOps** principles and practices. Participants will also acquire skills in automating deployments, monitoring systems, and managing infrastructure as code. By the end of the training, individuals will be equipped with the knowledge and tools needed to effectively implement **DevOps** practices in their organizations and enhance collaboration between development and operations teams.
Practice Tests Included in DevOps Course
Our DevOps Certification Course Training in 2024 includes practice tests to help you prepare for your certification exam. These tests are designed to simulate the real exam experience, allowing you to assess your knowledge and identify areas for improvement.
By taking these practice tests, you can gain confidence and familiarity with the exam format, ensuring you are fully prepared on the day of your certification exam. Our course covers key topics such as Docker, Scrum, Python, and other essential aspects of the DevOps framework.
Enroll in our course today to access these valuable practice tests and take the next step in your DevOps journey.
Other DevOps Courses Offered
Other DevOps courses offered include advanced training in Docker, Scrum methodologies, Python programming, and computing platform optimization. These courses provide in-depth knowledge and practical skills to enhance your DevOps capabilities and stay competitive in the industry. Whether you are looking to specialize in a specific area or broaden your skill set, these courses offer a range of options to cater to your needs. Stay ahead of the curve and explore the diverse range of DevOps courses available to further your career growth.
Salary Expectations Post DevOps Certification
After completing a DevOps certification course, you can expect a significant increase in your salary. Professionals with DevOps skills are in high demand, and organizations are willing to pay top dollar for those who possess them. With the ability to efficiently manage Linux systems, utilize Docker for containerization, and implement Scrum methodologies, you can command a higher salary in the job market.
Additionally, proficiency in Python programming and experience working with various computing platforms will further enhance your earning potential. By investing in a DevOps certification, you are not only expanding your skill set but also opening doors to lucrative career opportunities.